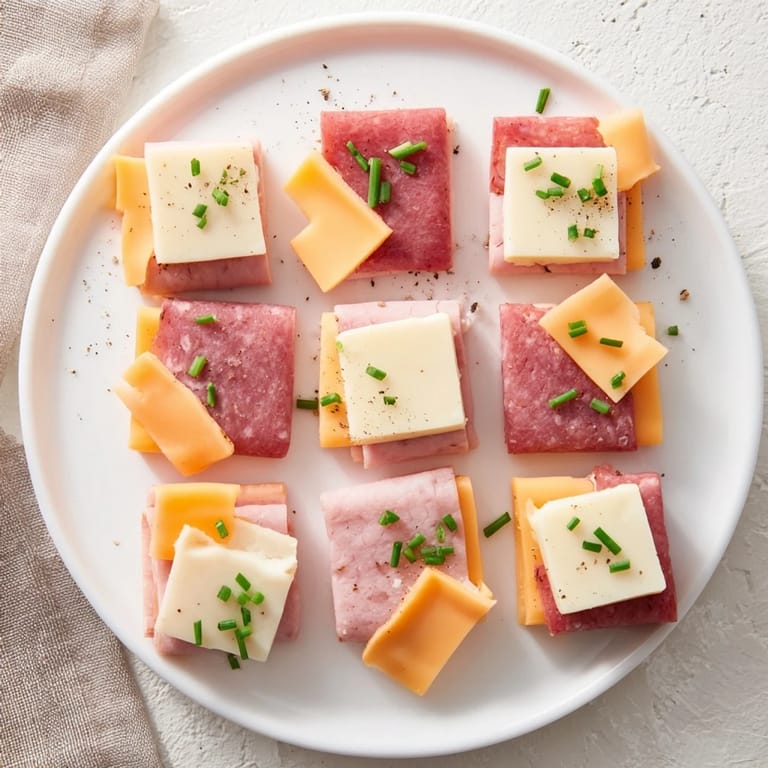
 Save to Pinterest
 I discovered the magic of checkerboard picnic bites at a summer garden party years ago, when a friend arrived with this strikingly simple yet elegant appetizer. The moment I saw those perfectly alternating squares of meat and cheese arranged in a grid, I realized elegance doesn't require cooking—just creativity and a sharp knife. That afternoon, as guests kept reaching for just one more bite, I understood that sometimes the best dishes are the ones that look like edible art.
I'll never forget the picnic where I first made these for a crowd—my hands were shaking slightly as I arranged each square, worried the pattern wouldn't be perfect. But as I stepped back and saw that grid come together, everyone gathered around the platter almost immediately. What struck me most wasn't just the compliments, but how this simple arrangement sparked conversations and made people slow down to appreciate something purely visual before eating it.
Ingredients
- Smoked turkey breast, 8 slices: This is your light meat element—mild, tender, and it provides a subtle smokiness that doesn't overpower the cheese. I've learned that asking your deli counter to slice it just slightly thicker than their standard gives you more structure when cutting into squares.
- Roast beef, 8 slices: The darker meat creates that visual contrast that makes the checkerboard pop. Choose a good quality roast beef that's thinly sliced but not tissue-thin, so it holds its shape when you cut and arrange it.
- Swiss cheese, 8 slices: Those characteristic holes give it a delicate appearance and a mild, slightly nutty flavor that complements both meats beautifully. Swiss is forgiving when you're cutting—it won't crumble or tear easily.
- Sharp cheddar cheese, 8 slices: The golden color provides the warm contrast to the pale Swiss, and its sharper flavor adds depth. Choose a good aged cheddar if you can—it stands up better structurally and tastes more interesting.
- Fresh chives, finely chopped (optional): A whisper of onion flavor and a pop of green that reminds people this is a fresh preparation, not a processed platter. Chop them just before serving so they don't wilt.
- Cracked black pepper (optional): Those visible pepper flakes add sophistication and a hint of heat that makes each bite interesting.
Tired of Takeout? 🥡
Get 10 meals you can make faster than delivery arrives. Seriously.
One email. No spam. Unsubscribe anytime.
Instructions
- Prepare your canvas:
- Lay out a piece of parchment paper or your favorite serving board as your work surface. This is your stage, and you want it clean and ready. If you're using parchment, it helps prevent the meats from sticking while you arrange everything.
- Cut your squares:
- Using a sharp knife and a cutting board, carefully cut each slice of meat and cheese into roughly 1-inch squares. Take your time here—uniform squares make the pattern look intentional and polished. The goal is to have all 16 pieces roughly the same size so the checkerboard reads clearly.
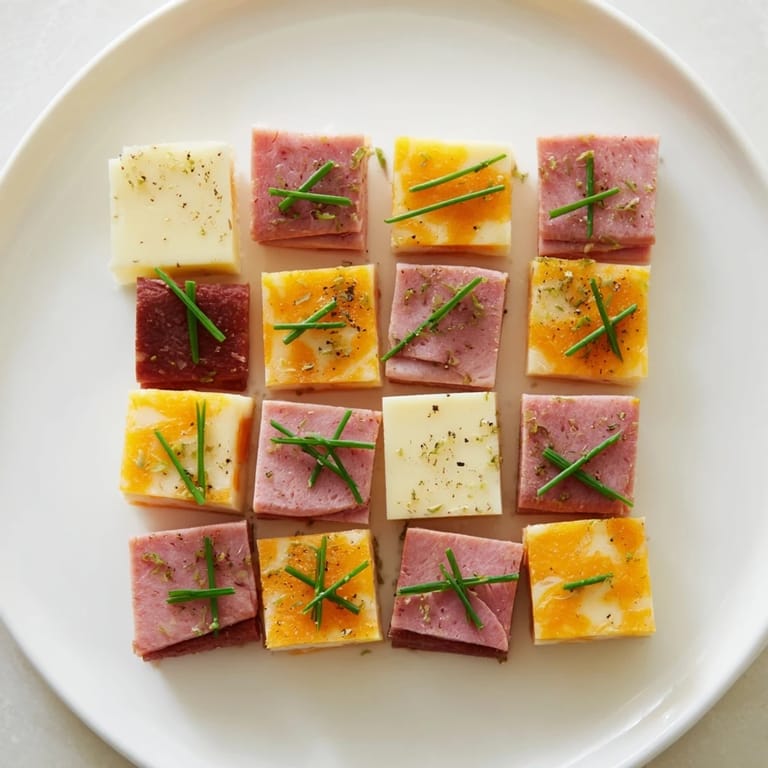
- Create the pattern:
- Now comes the satisfying part. Start in the top left corner with a turkey square. Next to it, place a cheddar square. Continue across that first row: turkey, cheddar, turkey, cheddar. Move to the second row and begin with cheddar—this offset creates your checkerboard. Fill in the remaining rows alternating between (roast beef and Swiss) and (turkey and cheddar). Step back occasionally to admire your work and adjust any squares that look misaligned.
- Set and secure:
- Gently press the adjacent squares together so they nestle slightly against each other. If you're planning to transport this, use a tiny, barely-visible dab of honey or whole grain mustard under each square—it acts like invisible glue without affecting the taste or appearance.
- Garnish and finish:
- Just before serving, sprinkle your chopped chives across the grid and crack fresh black pepper over the top. This final step is what transforms it from just alternating squares into something that says 'I cared about this.'
- Serve:
- Present at chilled temperature or room temperature, depending on your mood and the weather. Provide small toothpicks nearby so guests can easily pick up individual squares without disturbing your perfect pattern.
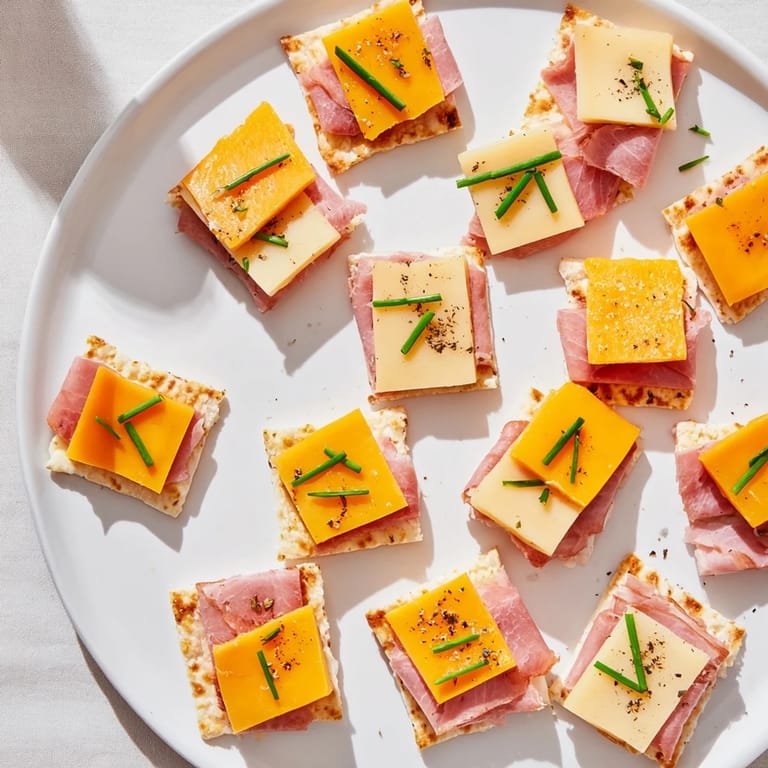
 Save to Pinterest
 The first time I made these for my sister's baby shower, something unexpected happened. As the afternoon progressed, people kept coming back not just to eat them, but to take photos of the platter. The checkerboard became a talking point, and I realized that food isn't just about taste—it's about creating a moment people want to remember and share. That's when I understood the real power of this simple recipe.
Timing and Prep Work
The beauty of this recipe is that you can prepare it entirely within 20 minutes, and most of that time is just cutting. I've found that if you're buying pre-sliced meats and cheeses from the deli counter, you're already ahead—all that's left is the careful cutting and arrangement. My tip: do your cutting about an hour before you want to serve, then arrange everything 15 minutes before guests arrive. This gives the pattern time to settle slightly and look natural, while everything is still fresh and hasn't started to dry out.
Flavor Combinations Worth Trying
While the turkey, roast beef, Swiss, and cheddar combination is a proven classic, this framework invites experimentation. I've had success with prosciutto and fresh mozzarella for an Italian twist, or salami and Havarti for something earthier. For a vegetarian version that's equally striking, try alternating thin-sliced roasted beets with crisp cucumber slices, or layer roasted red peppers with fresh buffalo mozzarella. The principle remains the same—you're seeking contrast in both color and flavor, so your guests experience something layered and interesting with each bite.
- Prosciutto and fresh mozzarella creates an elegant, Italian-inspired version that feels lighter and more delicate
- For vegetarians, roasted beets paired with crisp cucumber slices creates the same visual drama with completely different flavors
- Always choose ingredients with different textures and colors so your checkerboard reads clearly and tastes complex in every bite
Transport and Storage Tips
I learned the hard way that these little bites are surprisingly resilient. If you need to transport them, a thin layer of honey or good mustard under each square keeps everything from shifting during the journey. The checkerboard will stay intact even if jostled a bit. They're best served within a few hours of assembly—after that, the meats can start to dry slightly and the cheeses may soften unevenly if left at room temperature. However, they can be prepared, covered with plastic wrap, and refrigerated for up to 4 hours before serving. Just let them come to room temperature for 10 minutes before serving if they've been chilled, so the cheese tastes creamy rather than dense.
 Save to Pinterest
 Every time I arrange these checkerboard bites now, I'm transported back to that first garden party and reminded that the simplest ideas, executed with care and intention, create the most memorable moments. These little squares are proof that entertaining doesn't require hours in the kitchen—just thoughtfulness and a willingness to play with color and pattern.
Recipe FAQs
- → How do I keep the bites from falling apart during transport?
Use a small amount of honey or mustard beneath each square to help them stick together, and press the pieces gently to ensure adhesion.
- → Can I substitute the meats or cheeses?
Yes, try prosciutto with mozzarella or salami with Havarti for different flavor combinations; vegetarian swaps like roasted beet and cucumber also work well.
- → What is the best way to serve these bites?
Arrange on a serving platter chilled or at room temperature, and provide toothpicks for easy pickup.
- → Are there any common allergens to be aware of?
The bites contain dairy due to cheese and may contain allergens present in deli meats such as soy or preservatives; the dish is gluten-free as prepared.
- → How long does it take to prepare these checkerboard bites?
Preparation requires approximately 20 minutes, with no additional cooking needed.