 Save to Pinterest
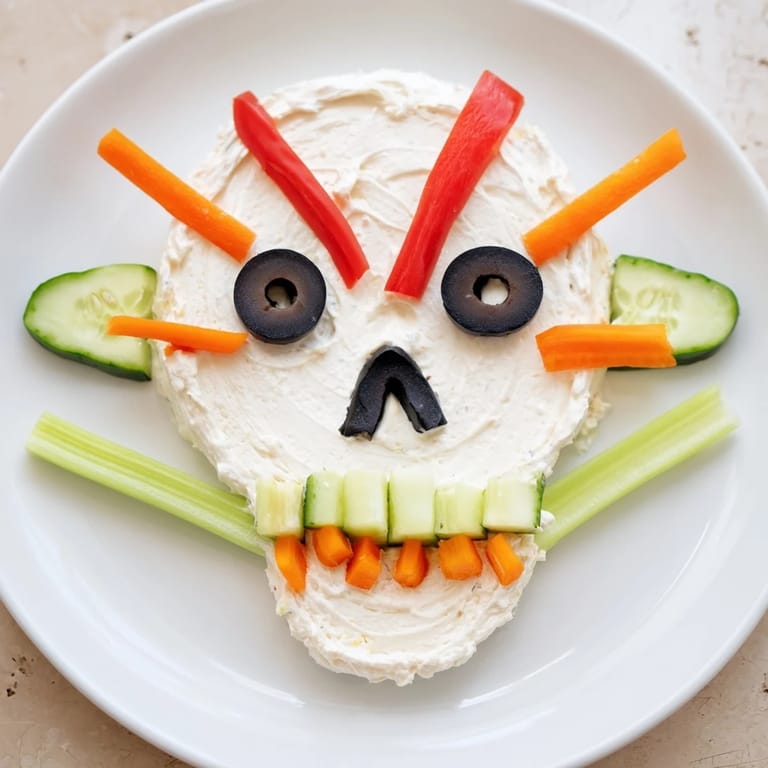
 I'll never forget the October afternoon when my nephew burst into the kitchen, eyes wide with excitement about the Halloween party happening that weekend. He wanted something spooky but not too scary, something fun the other kids would actually eat. That's when I remembered a trick I'd learned years ago—taking something as simple as cream cheese and turning it into a skull right there on the platter. The magic wasn't in fancy techniques; it was in watching his face light up when he realized the appetizer was shaped like a skull with crossbones. That moment taught me that the best party food isn't about being complicated—it's about being memorable.
I made this for my daughter's school Halloween celebration, and what I didn't expect was how the kids would gather around it like it was the coolest thing at the table. One little girl asked if she could take a picture with it before eating it. That's when I realized this spread isn't just food—it's a moment, a conversation starter, and honestly, one of the easiest ways to be the parent everyone remembers.
Ingredients
- Cream cheese (8 oz), softened: This is your canvas. Softening it first is non-negotiable—cold cream cheese won't shape smoothly, and you'll spend way more time fighting with it than you need to. I usually leave mine on the counter for 15 minutes while I prep the vegetables.
- Sour cream (2 tbsp): This lightens the spread and gives it a subtle tang that makes people keep coming back for more. It's the ingredient that prevents the cream cheese from tasting one-note.
- Garlic powder (1 tsp): A whisper of garlic that makes this feel more like a sophisticated dip than plain spread. If you love garlic, this is your moment to add a tiny bit more.
- Lemon juice (1 tsp): This brightens everything. It's such a small amount, but it's what stops this from tasting heavy or one-dimensional.
- Salt and pepper, to taste: Taste as you go here—you're the boss of the seasoning, and everyone's palate is different.
- Black olives (2 large): These become the eyes, and they're the detail that makes people say 'oh!' when they realize what they're looking at. Get the good ones if you can; they photograph better.
- Red bell pepper strips: These create the mouth and add a bright pop of color that makes your skull less monochromatic. They're also naturally sweet, which balances the savory spread perfectly.
- Carrot rounds and slices: Part of your skull's structure and teeth. Carrots add sweetness and that satisfying crunch that keeps people coming back.
- Cucumber slices: These are your color variation and texture contrast. They wilt slightly as they sit, which is actually fine—it makes the whole thing look more organic.
- Celery sticks or breadsticks (2–4, long): These form the crossbones underneath. Celery is naturally gluten-free and adds a nice visual, but breadsticks work if you want something more decorative. I prefer celery because it's more stable and less likely to break.
- Fresh parsley or chives (optional): This is your garnish, your finishing touch. It adds a hint of sophistication and a whisper of green that grounds the whole design.
Tired of Takeout? 🥡
Get 10 meals you can make faster than delivery arrives. Seriously.
One email. No spam. Unsubscribe anytime.
Instructions
- Make your spread:
- In a bowl, combine your softened cream cheese, sour cream, garlic powder, lemon juice, salt, and pepper. Stir it together until everything is completely smooth and well combined. Don't rush this—lumpy spread won't shape properly, and you want that canvas to be perfect.
- Shape your skull:
- Pour the spread onto your serving platter and use a spatula to sculpt it into an oval skull shape. Think of it like you're creating the foundation of a face. Smooth the top as much as you can. It doesn't need to be perfect—slightly imperfect edges actually look more authentically skull-like.
- Add the crossbones:
- Take your celery sticks or breadsticks and lay them underneath the skull in an X formation, like crossbones on a pirate flag. These should stick out past the edges of the cream cheese for maximum effect.
- Create the eyes:
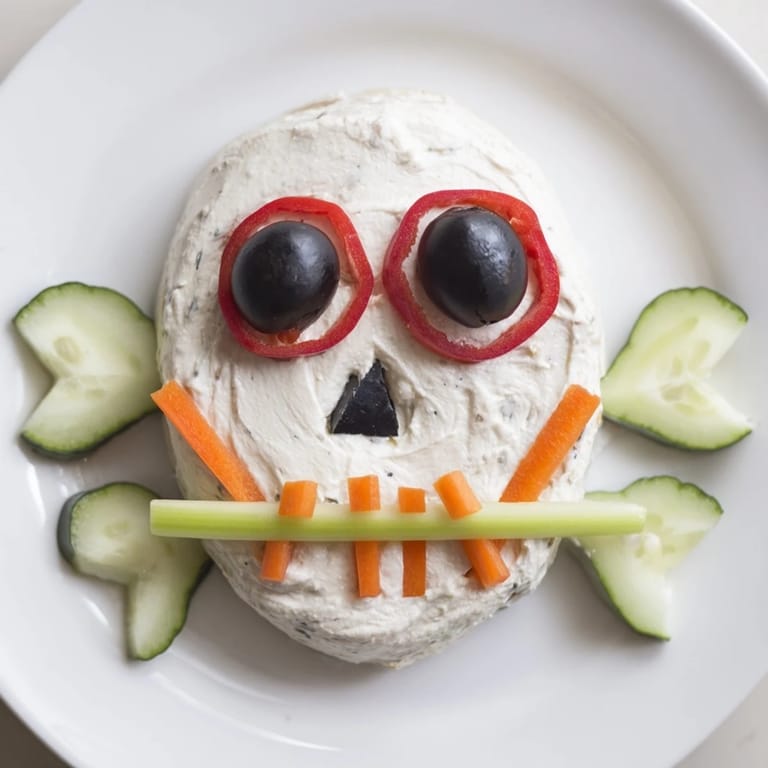
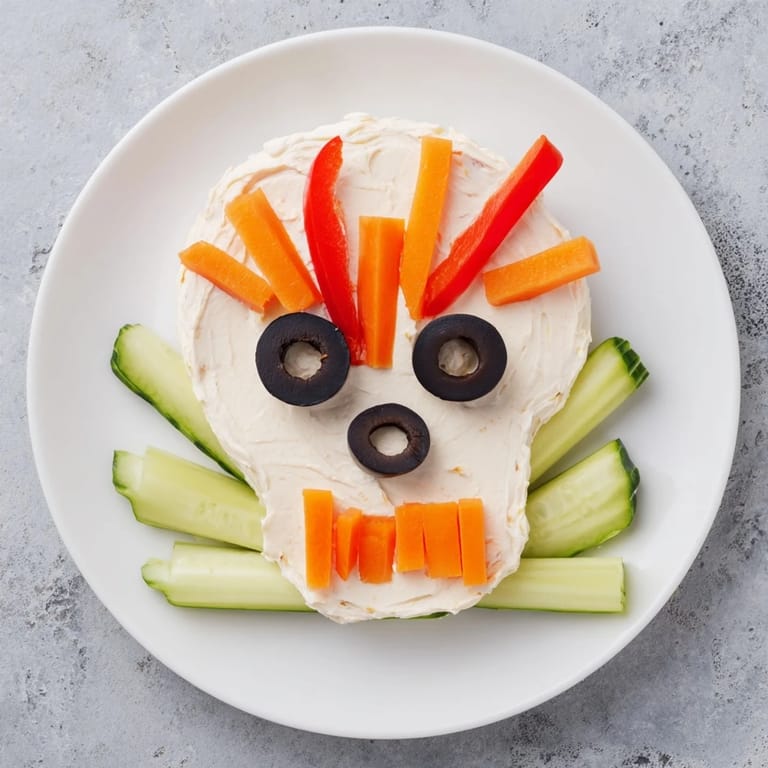
- Place your two black olive halves where the eyes would naturally sit—higher up on the oval, slightly angled. This is the moment when it suddenly becomes a skull. You'll feel the shift.
- Build the face features:
- Add a carrot piece or olive slice for the nose. Arrange red bell pepper strips in a curved smile for the mouth, and position carrot rounds below that as teeth. Step back and look at what you've created. Adjust as needed.
- Fill in the details:
- Scatter cucumber slices around the skull to add color and fill in negative space. Add any remaining vegetables to complete the design and create visual interest.
- Final touches:
- If you're using fresh parsley or chives, sprinkle them lightly over the skull. This adds sophistication and makes the whole thing look intentional and polished.
 Save to Pinterest
 The real magic happened when I served this at a potluck where I didn't know many people. Strangers became friends because of a silly skull appetizer. People were laughing, taking photos, and the thing I'll remember most is how something so simple brought everyone together. That's what good food does—it creates moments.
Timing and Prep Strategy
Here's what I've learned about when to make this: prepare everything at least 2 hours ahead of your party. Shape the skull, arrange your vegetables, and let it chill in the fridge. Chilled cream cheese spreads taste better and have a more luxurious texture. You can also prep all your vegetables earlier in the day, keep them in containers, and then assemble the skull right before guests arrive. This takes pressure off and means you're not stuck in the kitchen at the last minute. I usually set a phone reminder for 15 minutes before people arrive—that's when I pull it out of the fridge so it's perfectly chilled but not rock-hard.
Flavor Variations and Personal Twists
The beauty of this recipe is that it's endlessly customizable. I've made it with herbed cream cheese when I wanted something more sophisticated—that's just mixing fresh herbs into the spread before shaping. I've added finely chopped chives for extra flavor and a bit of visual texture. Some people add a tiny bit of hot sauce to the spread if they want it to have a kick, or cream it with a pinch of smoked paprika for a deeper flavor. One time I tried mixing in finely minced sun-dried tomatoes, and it was surprisingly delicious. The spread is your playground, and the vegetables are just your tools. Don't be afraid to experiment with what's in your kitchen.
Serving and Storage Tips
Serve this chilled, but not straight from the freezer—you want it cool enough to keep its shape but soft enough to spread easily. Have crackers, pita chips, sliced vegetables, and breadsticks nearby for dipping. People will want options. As for storage, cover it loosely with plastic wrap and keep it in the fridge for up to 2 days. After that, the vegetables start to release moisture and the whole thing gets a bit sad. If you need to make it further ahead, prepare the spread alone and store it separately, then assemble everything a few hours before your party. This way, everything stays fresh and looks its absolute best.
- Keep extra dippers on hand because this spread goes faster than you'd expect
- If the cream cheese gets too soft, stick it back in the fridge for 10 minutes to firm up
- Arrange vegetables in a pattern you can remember, so you can recreate it if needed
 Save to Pinterest
 This recipe reminds me that the most memorable party food doesn't have to be complicated—it just has to make people smile. Every time someone walks up and says 'wait, that's a skull!' I remember why I love cooking for people.
Recipe FAQs
- → What vegetables are used for decoration?
Cucumber slices, red bell pepper strips, black olive halves, carrot rounds, and celery sticks form the skull features and crossbones.
- → Can I make this dairy-free?
This spread relies on cream cheese and sour cream, but you can try dairy-free cream cheese alternatives for a similar texture.
- → How long does preparation take?
All preparation can be completed within 20 minutes, with no cooking required.
- → Is this suitable for gluten-free diets?
Yes, using celery sticks or gluten-free breadsticks ensures a gluten-free option.
- → Can I add herbs for extra flavor?
Fresh parsley or chives can be added as garnish to enhance aroma and taste.