 Save to Pinterest
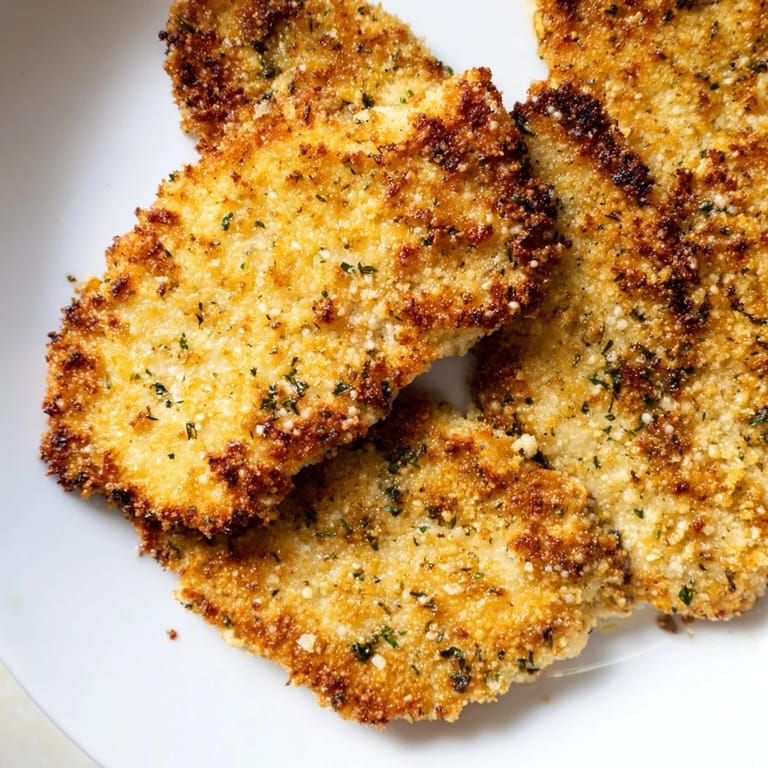
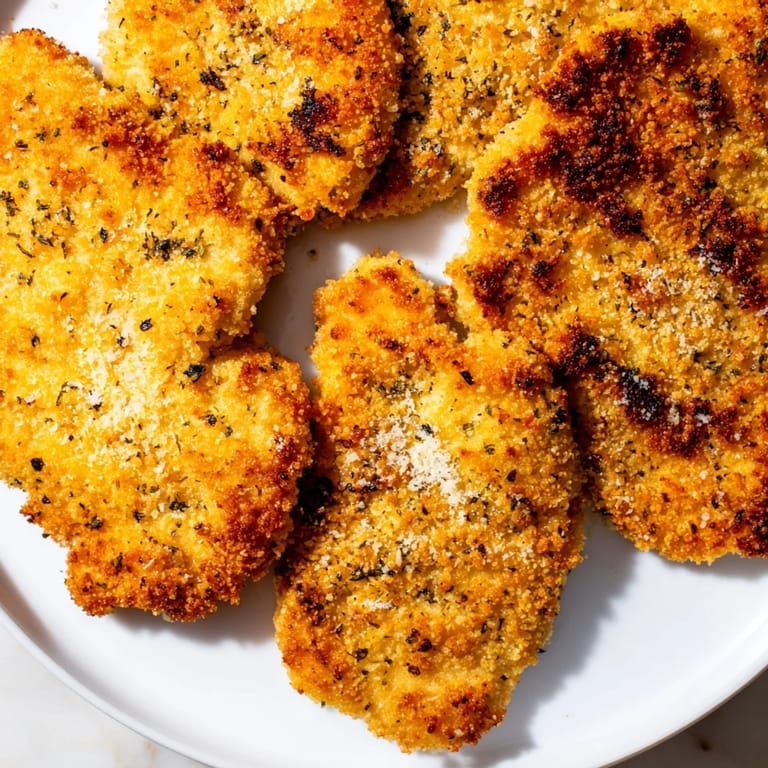
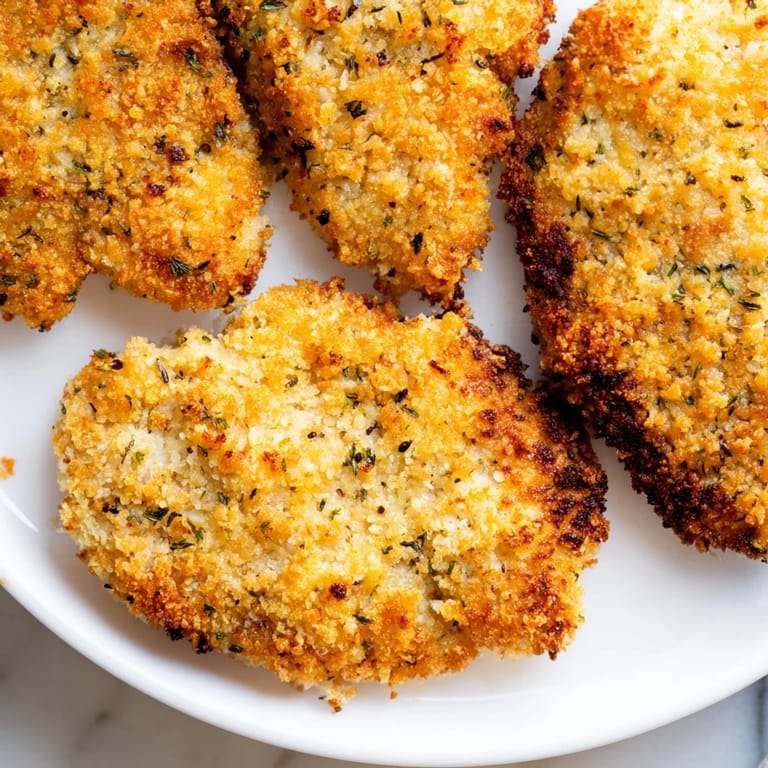
 There's something about the sizzle of chicken hitting a hot pan that makes you feel like you're doing something right in the kitchen, even if you're just starting out. Years ago, I was tired of the same old boring chicken dinners, so I decided to try coating them in Parmesan and baking instead of frying. The first time I pulled them out of the oven, golden and crackling, I knew I'd stumbled onto something that would become a weeknight staple. That crispy crust hiding the tender, juicy meat inside felt like a small victory.
I remember my sister coming over for dinner and being genuinely surprised that these weren't deep-fried. She kept asking how I got them so crispy in the oven, like it was some kind of kitchen secret I'd been holding back. The best part was watching her go back for seconds while barely touching the salad I'd spent way more time on.
Ingredients
- Chicken breasts: Four boneless, skinless breasts about 1.5 pounds total; pounding them thin is the secret to even cooking and tenderness.
- All-purpose flour: Half a cup serves as your first coating layer, helping everything else stick properly.
- Eggs: Two large ones beaten with a splash of milk create the glue that holds your crust together.
- Panko breadcrumbs: One cup gives you that satisfying crunch; regular breadcrumbs work but panko stays crispier longer.
- Parmesan cheese: Half a cup grated fresh tastes infinitely better than the pre-grated stuff in the green shaker.
- Garlic powder: One teaspoon adds savory depth without any actual garlic to burn.
- Dried Italian herbs: One teaspoon of basil, oregano, or a mix brings that Mediterranean warmth to every bite.
- Salt and pepper: Half a teaspoon salt and a quarter teaspoon of fresh cracked pepper round out the flavors.
- Olive oil: Two tablespoons or a light spray is all you need for that golden finish.
- Fresh parsley and lemon: Optional but they make the plate look like you actually tried.
Tired of Takeout? 🥡
Get 10 meals you can make faster than delivery arrives. Seriously.
One email. No spam. Unsubscribe anytime.
Instructions
- Set your stage:
- Preheat the oven to 425 degrees and line your baking sheet with parchment paper, then give it a light spray or brush of oil so nothing sticks.
- Thin out your chicken:
- Lay each breast on a cutting board and carefully slice it horizontally to butterfly it open, then use a meat mallet to pound it to about half an inch thick. Pat everything dry with paper towels because any moisture is the enemy of crispiness.
- Prepare your breading station:
- Line up three shallow bowls: one with flour, one with beaten eggs mixed with a splash of milk, and one with panko, Parmesan, garlic powder, herbs, salt, and pepper all stirred together.
- Coat each cutlet:
- Dredge the chicken in flour first, shake off the excess, dip it in egg, then press both sides firmly into the panko mixture so the crust really adheres. This is where patience pays off.
- Arrange and oil:
- Place all your breaded cutlets on the prepared sheet and give them a light drizzle or spray of olive oil, which helps them turn golden brown.
- Bake to golden:
- Slide everything into the oven for 22 to 25 minutes, flipping halfway through so both sides get evenly crispy and golden. The chicken is done when an instant-read thermometer hits 165 degrees in the thickest part.
- Finish and serve:
- Let them rest for just a minute, then plate them up with fresh parsley scattered on top and lemon wedges on the side if you want brightness and acidity to cut through the richness.
 Save to Pinterest
 There was one night when my kid, who usually turns their nose up at chicken, actually cleaned their plate without complaining. That's when I realized this wasn't just a recipe I'd mastered; it was something that somehow made everyone at the table happier.
Why This Method Works
Baking instead of frying feels almost like cheating because you get the same crackling crust without the oil splatters and kitchen smell that lingers for days. The high oven temperature and parchment paper create a dry heat environment that crisps up the exterior while the gentle, enclosed warmth keeps the inside tender and juicy. I've made these a hundred different ways, and baking with a light oil spray is the only method that consistently delivers both texture and ease.
Variations and Swaps
This recipe is forgiving enough that you can swap things around based on what you have or what you're craving. Boneless thighs work beautifully if you want richer, more forgiving meat, though they'll take a minute or two longer to cook through. You can play with the breading too—some people crush up everything bagel seasoning into the panko, others add a pinch of cayenne for heat, and I've even seen versions with a little nutritional yeast mixed in for extra nuttiness.
Serving Ideas and Pairings
These cutlets are endlessly versatile because they're crispy, protein-packed, and don't demand much beyond their own deliciousness. I've served them alongside simple arugula salads dressed with lemon and olive oil, tucked into sandwiches the next day with just a smear of mayo, tossed with pasta and marinara, or even sliced thin and layered into a fresh tomato salad. The key is letting them shine without overcrowding the plate, because the golden crust is honestly the star of the show.
- Pair with a crisp white wine like Pinot Grigio or a light, refreshing lager if you're drinking.
- Make it a full Italian-American night with roasted vegetables, a simple salad, and good bread for soaking up any pan drippings.
- Slice them cool and use as elegant finger food for a casual dinner party with a squeeze of fresh lemon.
 Save to Pinterest
 This recipe taught me that some of the best meals come from taking shortcuts that actually work, not from following food blog recipes that require seventeen specialty ingredients and three hours of fussing. These cutlets are proof that weeknight cooking can be both quick and genuinely delicious.