 Save to Pinterest
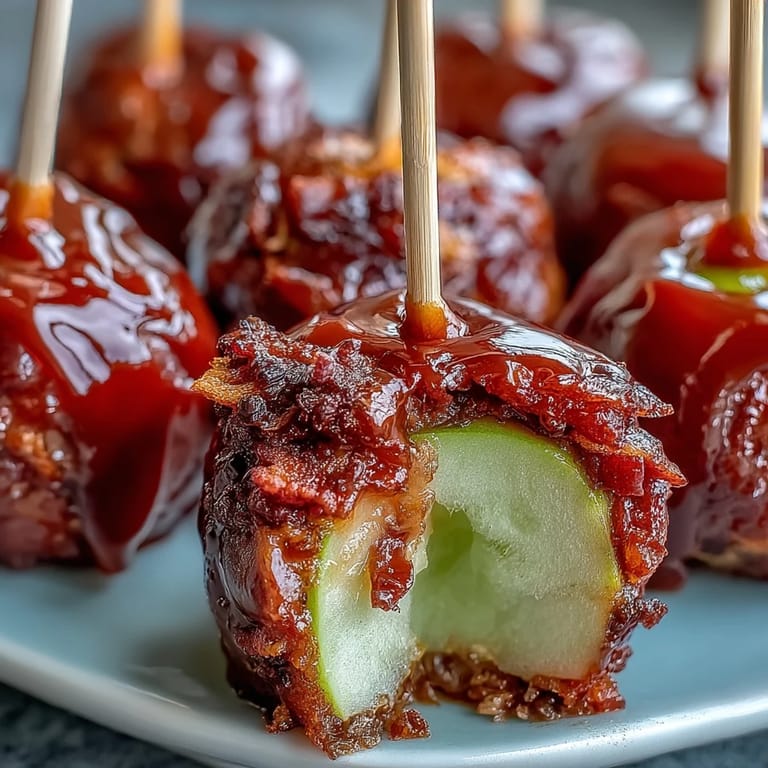
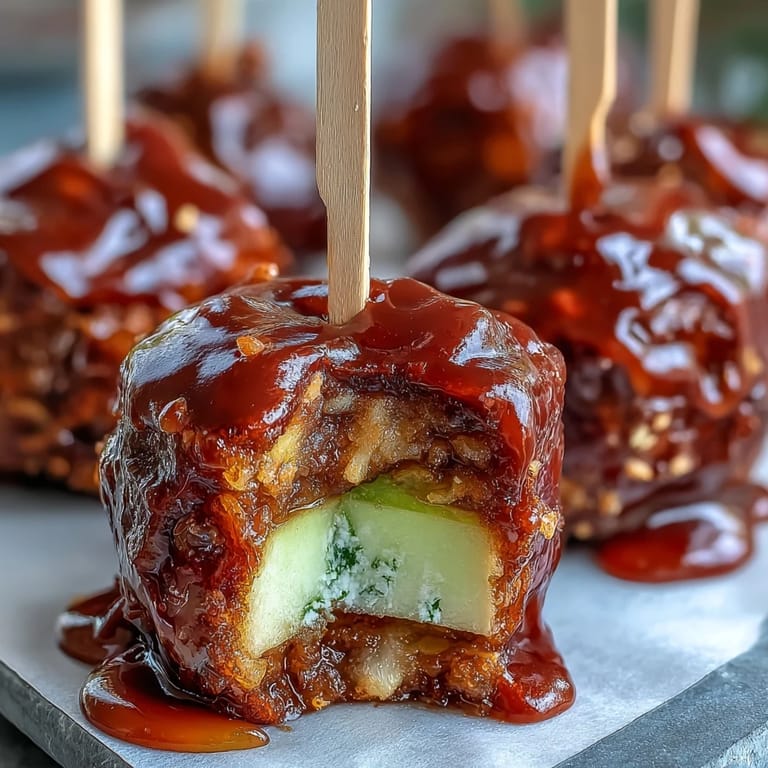
 My neighbor Sarah showed up at my door one afternoon with a plate of these tiny candy apple bites, and I was honestly mesmerized by how the light caught the glossy red coating. She'd made them for her daughter's school fundraiser, and watching people devour them at the event made me realize these weren't just desserts, they were conversation starters. The crunch of the candy against the tart apple, all on a toothpick you could pop in your mouth in one bite, felt almost magical in its simplicity. I begged for the recipe that night, and now I make them whenever I need something that feels fancy but comes together in minutes.
I made these for my coworker's birthday potluck last spring, and I remember being nervous about transporting them, so I packed them flat in a shallow container with parchment between layers. When I opened the lid at the office, the red coating caught the fluorescent lights and created this unexpected moment of beauty in our bland break room, and suddenly everyone wanted to know what they were. That's when I realized these little bites have a way of making people pause and actually enjoy something, rather than just grabbing and going.
Ingredients
- 2 large crisp apples (Granny Smith or Fuji): The tartness cuts through the sweetness perfectly, and tart varieties hold their texture better than softer apples like Red Delicious.
- 1 cup granulated sugar: This is your base for that hard crack stage candy, and measuring precisely matters here.
- 1/3 cup light corn syrup: This prevents the sugar from crystallizing and gives you that glossy, smooth finish.
- 1/4 cup water: Just enough liquid to help the sugar dissolve evenly at the start.
- 1/4 teaspoon red food coloring: A little goes a long way, so add it slowly and stir well to avoid streaks.
- Nonstick cooking spray: This prevents sticking without adding oil that would compromise your candy coating.
- Optional toppings (nuts, chocolate chips, or sprinkles): Add these in the three-second window after dipping, before the coating hardens, or they'll just slide off.
Tired of Takeout? 🥡
Get 10 meals you can make faster than delivery arrives. Seriously.
One email. No spam. Unsubscribe anytime.
Instructions
- Set up your dipping station:
- Line a tray with parchment paper and give it a light spray of nonstick coating, then gather all your supplies within arm's reach because once the candy hits temperature, you're moving fast.
- Prepare the apples:
- Core each apple and cut them into roughly 1-inch chunks, then pat them completely dry with paper towels because any moisture will prevent the candy from sticking. Insert a toothpick into the center of each chunk and set them on a plate nearby.
- Combine the candy base:
- Pour sugar, corn syrup, and water into a small saucepan and stir just until everything is moistened and combined. Once it starts to bubble, stop stirring entirely, as agitation causes crystallization.
- Heat to hard crack stage:
- Turn up the heat to medium-high and let the mixture boil without stirring, watching your candy thermometer carefully until it reaches 300°F, which usually takes 7 to 8 minutes. The bubbles will change from large and lazy to smaller and more vigorous as it reaches temperature.
- Color and prepare for dipping:
- The moment it hits 300°F, remove the pan from heat and quickly stir in the red food coloring until the color is even throughout. Work immediately because this mixture hardens as it cools.
- Dip with confidence:
- Grab an apple chunk by the toothpick and swirl it gently into the hot candy, making sure it's completely coated, then lift it out and let the excess drip back into the pan for a second or two. Place it on your prepared tray and move to the next one.
- Add finishing touches right away:
- If you're using toppings, sprinkle them on immediately after placing each dipped bite on the tray, while the candy is still tacky and they'll adhere. Once the coating begins to set, toppings won't stick.
- Cool completely before serving:
- Let everything sit undisturbed at room temperature until the coating has hardened completely, usually about 20 minutes, then you can stack and serve them.
 Save to Pinterest
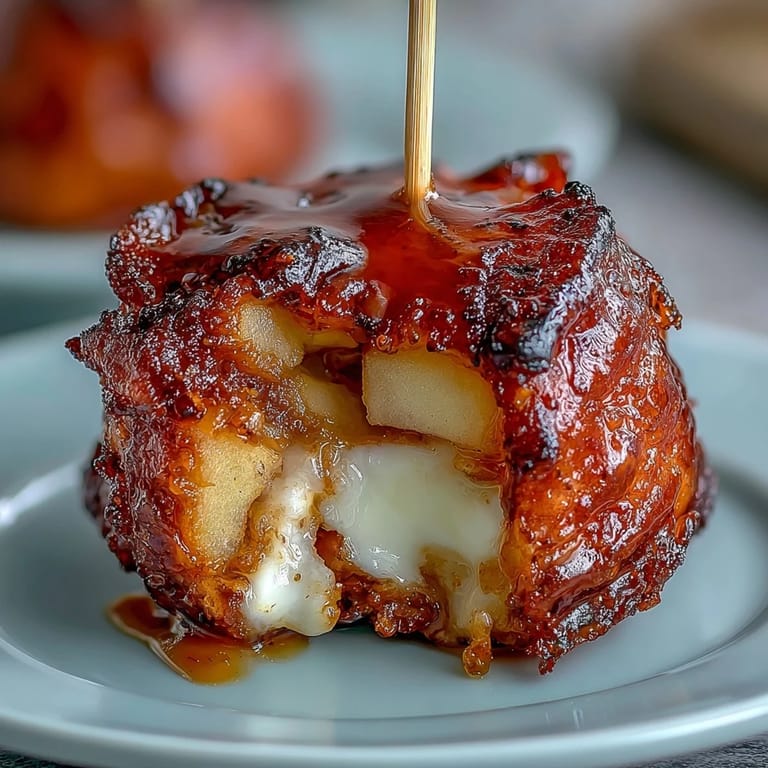
 My daughter once bit into one of these and her eyes lit up in this pure, unselfconscious way that reminded me why we cook for people we love. It wasn't complicated or expensive, just an apple and some candy, but the joy on her face was completely real and made every bit of effort worthwhile.
The Science Behind the Shine
When sugar reaches 300°F, it transforms into what candy makers call the hard crack stage, where the sugar molecules have released almost all their water and form these delicate, glassy structures that snap when you bite them. That's what gives you that satisfying crack before your teeth hit the soft apple underneath, and it's why patience with the thermometer matters so much. Once you understand what's happening chemically, the whole process feels less like magic and more like you're actually controlling something pretty cool.
Timing and Temperature Control
The trick I learned after a few batches is that once your candy reaches 300°F, you have maybe three to four minutes before it starts to set and become too thick to dip smoothly, so having everything prepped and nearby prevents panic. I keep a damp cloth nearby to quickly wipe the thermometer between checks so I can read it clearly. If your candy does get too thick, you can gently reheat it over low heat until it loosens back up, but it's way easier to just work quickly from the start.
Storing and Sharing These Bites
These keep beautifully in an airtight container at room temperature for several days, and they actually taste even better the next day once the candy and apple have bonded fully. I've transported them to parties by laying them flat in a shallow box with parchment between layers, and they travel better than you'd expect. The real challenge isn't storage, it's not eating them all in the first sitting.
- Keep them in a cool, dry spot away from humidity, which softens the candy coating over time.
- If you make a big batch, separate the layers with parchment so they don't stick together.
- These are perfect for bringing to potlucks, holiday parties, or handing out as homemade gifts because they feel special without requiring fancy packaging.
 Save to Pinterest
 These little bites prove that some of the most impressive things to share with people are the ones that require the least fuss. They're the kind of recipe you'll find yourself making again and again because they're easy enough to do on a random Tuesday but fancy enough to actually impress.
Recipe FAQs
- → What apples work best for these bites?
Crisp apples like Granny Smith or Fuji hold up well and provide a tart contrast to the sweet coating.
- → How do I ensure the candy coating sticks properly?
Make sure apple pieces are completely dry before dipping to help the candy adhere smoothly and evenly.
- → Can I customize the coating colors?
Yes, swapping the red food coloring with green or other shades allows for festive variations.
- → Are there safe ways to add toppings?
Sprinkle nuts, mini chocolate chips, or sprinkles immediately after dipping before the coating hardens.
- → How long does the candy coating take to harden?
Let the coated apple pieces rest at room temperature for several minutes until fully hardened and crisp.