 Save to Pinterest
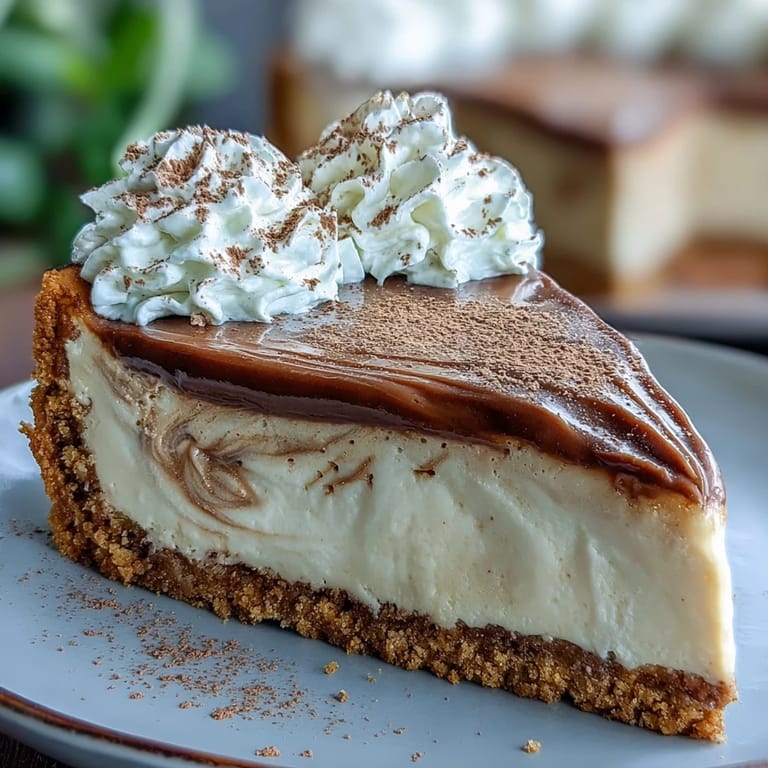
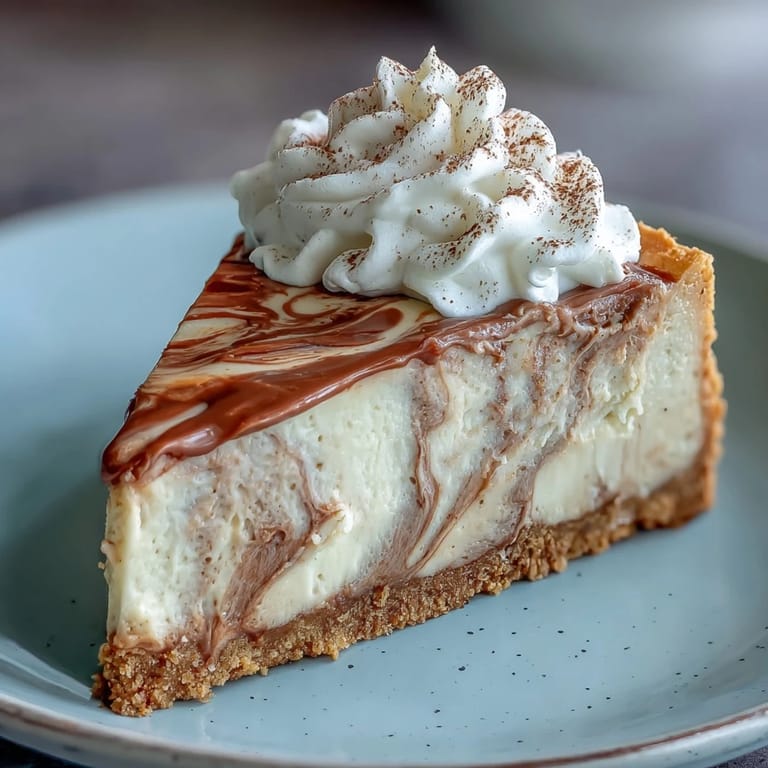
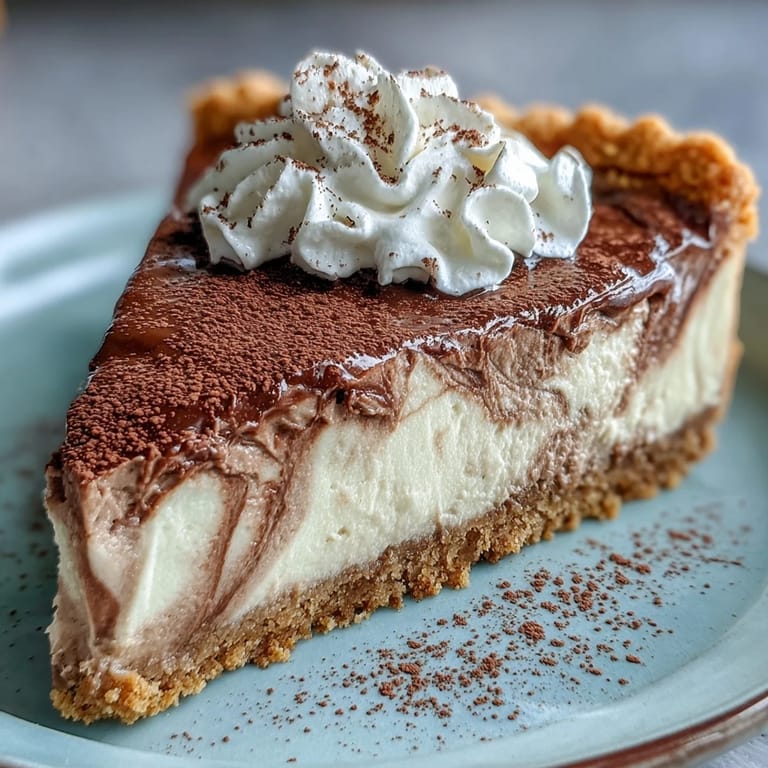
 My friend Sarah brought a small tin of hojicha tea back from Kyoto, and it sat on my counter for weeks before curiosity got the better of me. One afternoon, while the rain drummed against the kitchen window, I steeped a cup and found myself completely mesmerized by that toasty, almost nutty warmth. By evening, I was convinced this roasted tea needed to become a cheesecake, and honestly, the moment that first slice hit my plate with its beautiful brown swirl, I knew I'd stumbled onto something special.
I made this for a small dinner party last spring, and I'll never forget the silence when my neighbor took her first bite. She closed her eyes for a full second, then asked if I'd used some kind of magic potion. It wasn't magic—just cream cheese, eggs, and the gentle earthiness of hojicha—but somehow that combination created a moment where everyone at the table just paused and really tasted something.
Ingredients
- Graham cracker crumbs: The buttery foundation that holds everything together; don't skip baking the crust as it helps it stay crisp even with all that moisture on top.
- Unsalted butter: Use the good stuff since it's one of only three ingredients in the crust and nothing hides here.
- Granulated sugar (for crust): Just a light sweetness to balance the cream cheese layers above.
- Hojicha loose leaf tea: The star of the show; this roasted green tea has a warm, toasty character that makes people wonder what you did differently.
- Heavy cream: Steeping the hojicha in cream rather than water creates a richer, more integrated flavor that doesn't taste watered down.
- Cream cheese: Must be softened to room temperature or you'll end up with lumps that no amount of beating can fix.
- Granulated sugar (for filling): This is what creates the silky texture, so don't reduce it thinking you're being clever.
- Large eggs: Room temperature eggs mix in more smoothly; pull them out about 20 minutes before you start.
- Sour cream: Adds a subtle tang that makes the hojicha flavor pop and keeps the texture tender.
- Vanilla extract: Just a whisper to complement, not compete with, the tea.
- All-purpose flour: A tablespoon is all you need to stabilize the filling without making it dense.
Tired of Takeout? 🥡
Get 10 meals you can make faster than delivery arrives. Seriously.
One email. No spam. Unsubscribe anytime.
Instructions
- Heat your oven and prepare:
- Set the oven to 160°C (325°F) and line your springform pan with parchment paper on the bottom. A lower temperature prevents cracks and ensures the cheesecake sets gently rather than racing through the oven.
- Build the crust:
- Mix graham cracker crumbs with melted butter, sugar, and salt until it resembles wet sand, then press it firmly into the pan bottom. Bake for 10 minutes until lightly golden, then let it cool completely so the hojicha batter doesn't sink through.
- Steep the hojicha:
- Heat heavy cream until you see steam rising, add your hojicha tea, cover, and let it sit undisturbed for 10 minutes. The longer steeping time in cream (versus water) extracts more of that roasted tea character without bitterness.
- Strain and cool:
- Pour the hojicha cream through a fine strainer, pressing gently on the tea leaves, then set it aside to cool to room temperature. Warm hojicha cream mixed into the cheesecake will cook the filling unevenly.
- Beat the cream cheese smooth:
- In a large bowl, beat softened cream cheese until it's completely lump-free and fluffy, about 2 minutes. This step matters more than you'd think because any lumps will remain in the finished cake.
- Add sugar and eggs:
- Mix in sugar until combined, then add eggs one at a time, beating well after each addition. Adding them one at a time ensures even distribution and prevents overmixing.
- Fold in the wet ingredients:
- Gently add sour cream, vanilla, and flour, mixing just until combined. Overmixing at this stage introduces too much air and can create cracks.
- Create the hojicha portion:
- Divide about ⅓ cup of plain batter into a separate bowl and whisk in the cooled hojicha cream until the color is even and smooth. You'll have a beautiful light brown mixture that's ready to swirl.
- Pour and swirl:
- Spread the plain batter over the cooled crust, then drop spoonfuls of hojicha batter across the top. Use a skewer or thin knife to gently drag through the layers, creating those gorgeous natural-looking swirls without overworking the batter.
- Bake with patience:
- Set the pan on a baking tray and bake for 40–45 minutes until the edges are set but the center still jiggles slightly when you shake the pan. This is the sweet spot between underbaked and overbaked.
- Cool slowly in the oven:
- Turn off the oven, crack the door open about 2 inches, and let the cheesecake sit inside for a full hour. This gradual temperature change prevents the dreaded cracks that come from cooling too quickly.
- Chill thoroughly:
- Remove from the oven, let it cool to room temperature on the counter, then refrigerate for at least 5 hours or overnight. Patience here makes the flavors settle and the texture become perfectly creamy.
 Save to Pinterest
 There's something almost meditative about making this cheesecake, watching the hojicha cream swirl through the pale batter like watercolor on canvas. When someone you love takes a bite and their whole face changes, you understand why people spend years perfecting desserts.
The Magic of Hojicha
Hojicha is green tea that's been roasted at high temperature, which sounds simple but completely transforms the flavor profile. Unlike regular green tea's grassy brightness, hojicha brings warmth and depth—almost like toasted hazelnuts or caramel, but with an earthy edge that keeps it from being sweet. Using it in cheesecake means the tea itself becomes a structural flavor rather than just a garnish, and the roasted quality plays beautifully against the tang of sour cream and richness of cream cheese.
Why Steep in Cream
Steeping hojicha in heavy cream rather than water or milk creates a more luxurious, integrated flavor that doesn't taste diluted or watery. The cream's fat molecules hold onto the tea's aromatics and allow them to distribute evenly throughout the cheesecake filling, so every bite tastes intentional. I learned this by accident when I first made a hojicha infusion in water, poured it into the batter, and ended up with a slightly grainy texture where the liquid tried to separate.
Serving and Storage
Slice this cheesecake with a thin knife dipped in hot water between each cut for the cleanest presentation, and serve it cold straight from the refrigerator. The flavor actually deepens slightly over a day or two, so making it a day ahead is never a mistake. Store leftovers covered in the fridge for up to 4 days, though honestly it rarely lasts that long once people realize it exists.
- Dust the top with extra hojicha powder just before serving for a beautiful finish and an extra flavor hit.
- A dollop of lightly whipped cream alongside each slice adds an elegant touch without overwhelming the delicate tea flavor.
- If you're slicing ahead of time, a very light spray of cooking oil on your knife between cuts keeps everything looking pristine.
 Save to Pinterest
 This cheesecake sits at that perfect intersection of impressive and approachable, where the technique is straightforward but the result tastes like you've unlocked some secret knowledge. Once you make it, you'll find yourself reaching for hojicha in other desserts, wondering why it took so long to discover this incredible ingredient.
Recipe FAQs
- → What is hojicha and how does it affect the flavor?
Hojicha is a roasted Japanese green tea with a nutty, toasty flavor that lends a warm, earthy aroma to the dessert without bitterness.
- → How is the hojicha infused into the cheesecake?
Hojicha leaves are steeped in warm heavy cream to extract flavor, then mixed into a portion of the cheesecake batter creating a delicate swirl.
- → Can I substitute graham crackers for another crust base?
Yes, digestive biscuits can be used as a buttery alternative for the crust, maintaining a crisp, crumbly texture.
- → What is the best way to achieve the marbled swirl effect?
After pouring the plain batter over the crust, spoon the hojicha-infused batter on top and gently swirl with a skewer or knife for a marbled look.
- → How long should the cheesecake chill before serving?
Chilling for at least 5 hours or overnight is recommended to allow the cheesecake to set firmly and develop full flavors.